Create Template Apply to Multiple Pages: Difference between revisions
mNo edit summary |
|||
| (71 intermediate revisions by 2 users not shown) | |||
| Line 1: | Line 1: | ||
{{DISPLAYTITLE:Create a template and apply it to multiple pages}} | |||
==Who is this guide for? == | |||
Anyone looking to create '''a custom template''' (for '''Product''', '''Blog Post''', or '''Store Pages''') and apply it to '''multiple pages''' in bulk. | |||
{{Note|If you want to create a template that you can use for '''a single page''', '''a single product''', or '''a single blog post''', follow [[Create_Template_Apply_to_One_Page|this guide]] instead.|inline}} | |||
==Template basics== | |||
Templates are saved combinations of sections and settings that control the look, layout, and content of your store's pages. What templates and sections are available depends on the theme you use. | |||
==== | '''How to check which templates are applied to which pages?''' | ||
* Add, | *Option 1: In the theme editor, you can find which templates are applied to which pages | ||
*Option 2: Navigate to the specific page (product, collection, page, or blog post) in your Shopify admin, and check the bottom right section labeled Theme Template. | |||
{{Note|IMPORTANT: If you choose a default page template, any edits will apply to all pages using it.|reminder}} | |||
{{Note|By default, every product page uses the standard layout provided by Shopify. | |||
You can customize this default template through our app by following these steps:<br> | |||
1. Go to your Shopify admin and select '''Themes''' (under Sales Channel) > Click '''Customize''' next to your current theme to open the Theme Editor.<br> | |||
2. In the Theme Editor, use the template drop-down to select '''Product''' > '''Default Product'''.<br> | |||
3. Add any sections you want to this template. | |||
|inline}} | |||
== How to create a template == | |||
'''Step overview:''' | |||
* Create a template. | |||
* Assign a template to product. | |||
* Assign a template to multiple products in bulk. | |||
* Add new sections to the template. | |||
:{{Note|You can use the same steps above to create a template for all page types: Product, Article, or Store page.|inline}} | |||
=== Create a Blank template or select a Prebuilt one === | |||
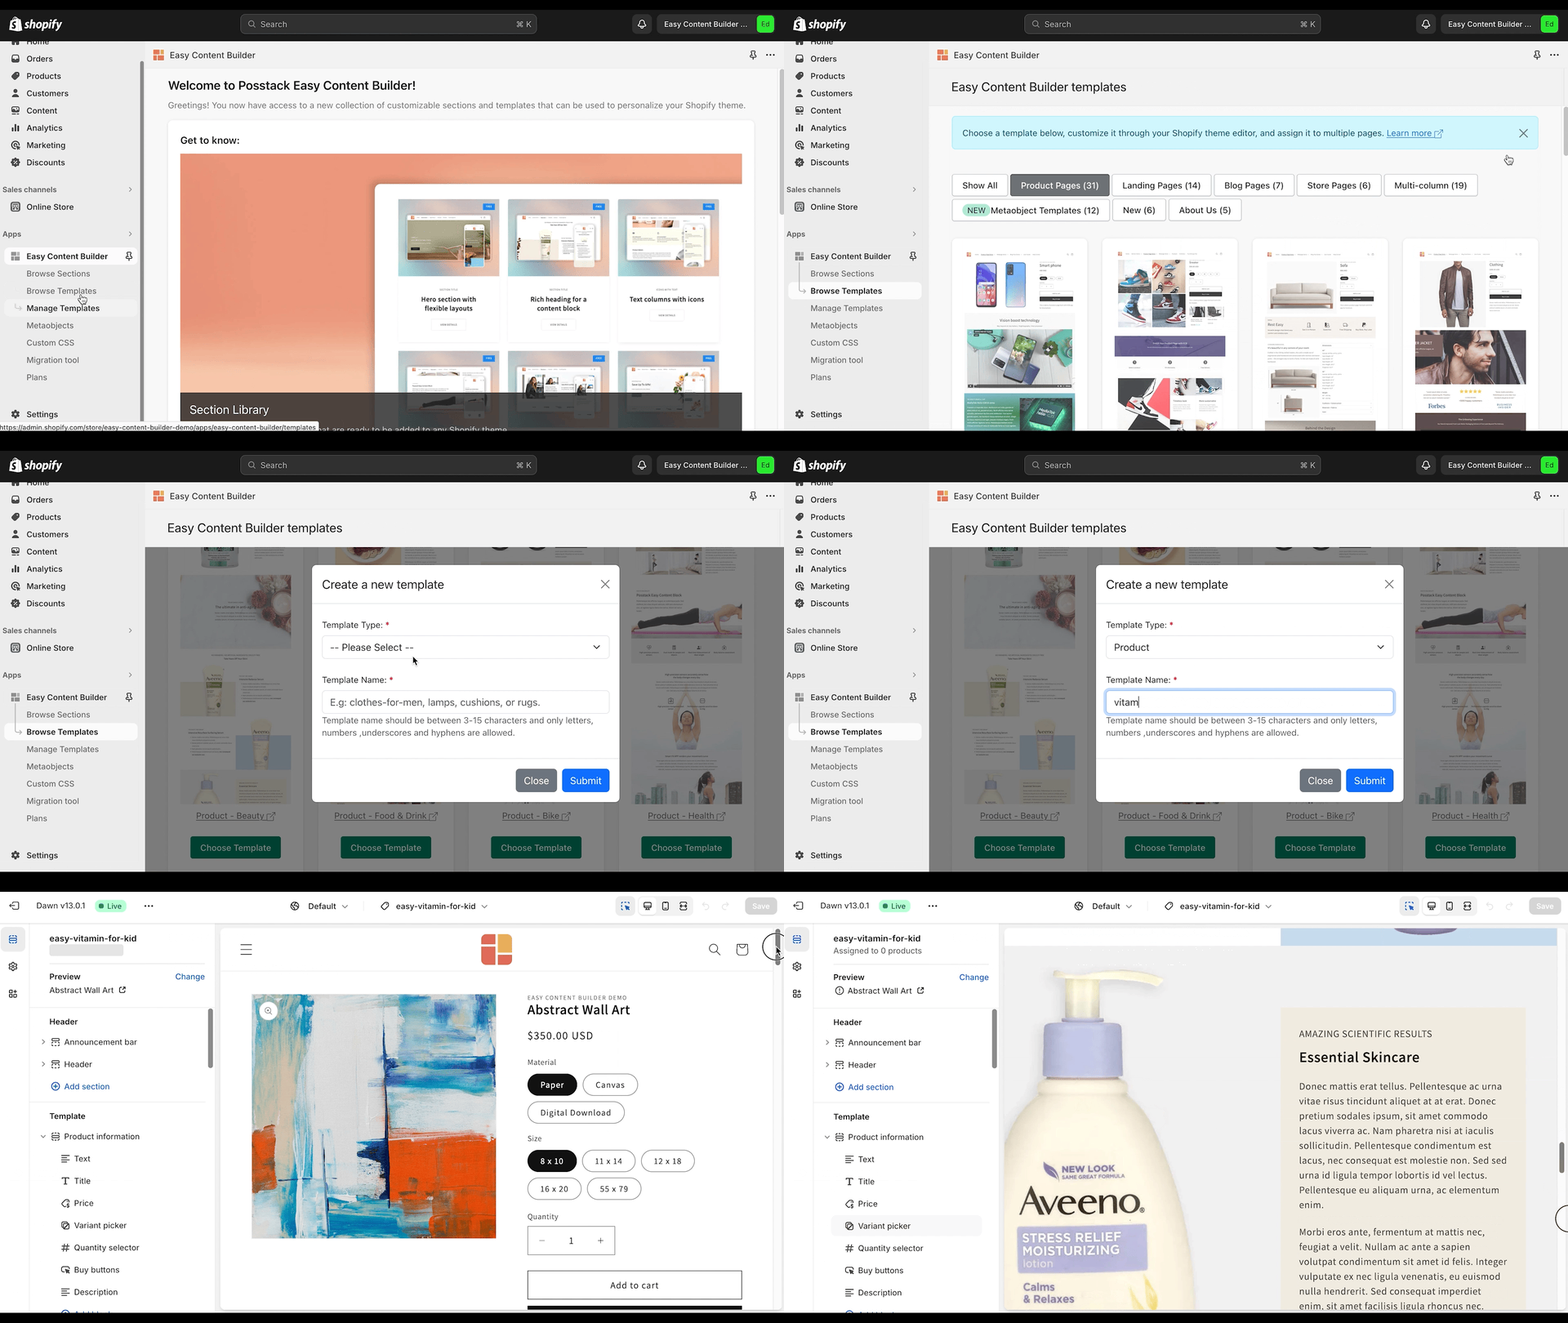
* Click '''Apps''' > '''Easy Content Builder''' > '''Browse Templates'''. | |||
* Find and select a prebuilt template. | |||
:{{Note|'''Create a Blank template''': If you want to create a blank template from scratch, click "Add Blank Template" instead of choosing a prebuilt option.|reminder}} | |||
* Set the template name. | |||
* Create a template. | |||
[[File:Ecb-flow-1-multi-pages-960-v2.gif|frameless|960x960px]] | |||
:{{Note|'''Note 1: Choose Template''': You have the option to start with a Blank template or use a pre-made template, which includes pre-built sections created by Easy Content Builder.|Reminder}} | |||
:{{Note|'''Note 2: The template name''': The template name should be between 3-15 characters - only letters, numbers, underscores and hyphens are allowed.|Reminder}} | |||
:After creating a template using the video above, you will be directed to your Shopify theme editor. From there, you can begin adding sections to the template you've just created. You can learn [[Add section settings|how to add a section here]]. | |||
===How to preview your Template with a specific page=== | |||
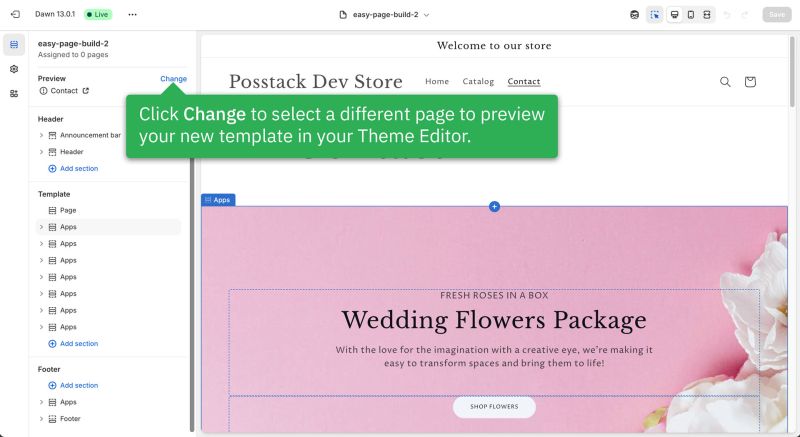
After creating a new template, you can preview it in the Theme Editor with any specific page. | |||
Click the '''Change''' button in the preview section. Depending on your template type (Product, Page, or Blog Post), Shopify will provide a list of relevant pages to choose from. Once you select a page, you can preview your new template in your Theme Editor accordingly. | |||
[[File:Preview-ecb-template.jpg|800px|frameless]] | |||
=== How to assign a template to one product=== | |||
* Open the '''Products''' page. | |||
* Find and select a product you want to assign the new template. | |||
* Edit the product. | |||
* Assign the template to the product. | |||
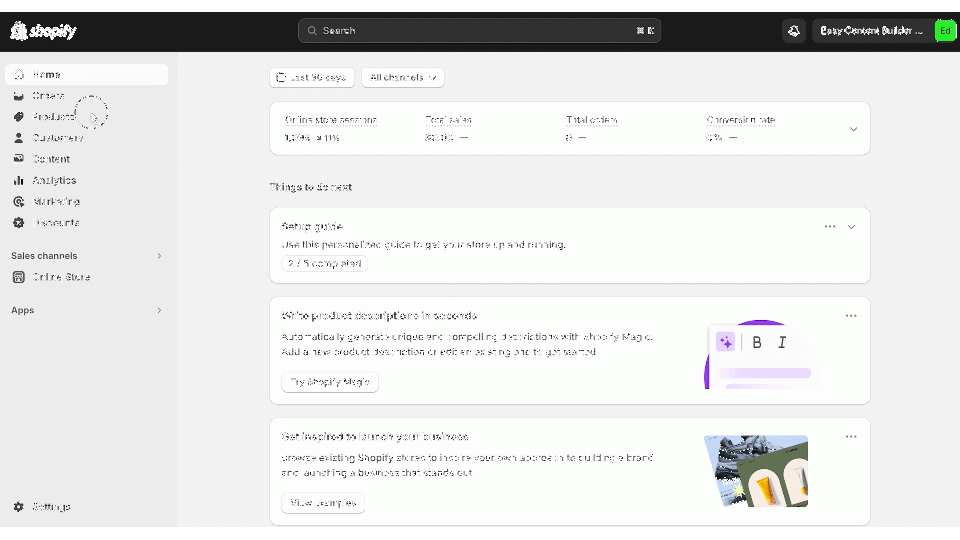
This video guides how to assign a template to a single product, and you can follow the same steps to assign a template to your blog post or store page. | |||
[[File:Ecb assign one product template v2.gif|frameless|960x960px]] | |||
{{Note|'''Note 1''': Perform the same steps for all products if you want to use the new template.|inline}} | |||
{{Note|'''Note 2''': You can also use the Bulk Editor (only available for Products) to assign a template to multiple products in bulk.|inline}} | |||
=== How to assign a template to multiple products in bulk === | |||
* Open the '''Products''' page | |||
* Find and select products you want to assign the new template. | |||
* Click on the Bulk Edit button from the toolbar. | |||
* On the Bulk Editor screen > Click the Columns button > Select the "Template" column. | |||
* Assign the new template to your chosen products. | |||
* Save changes. | |||
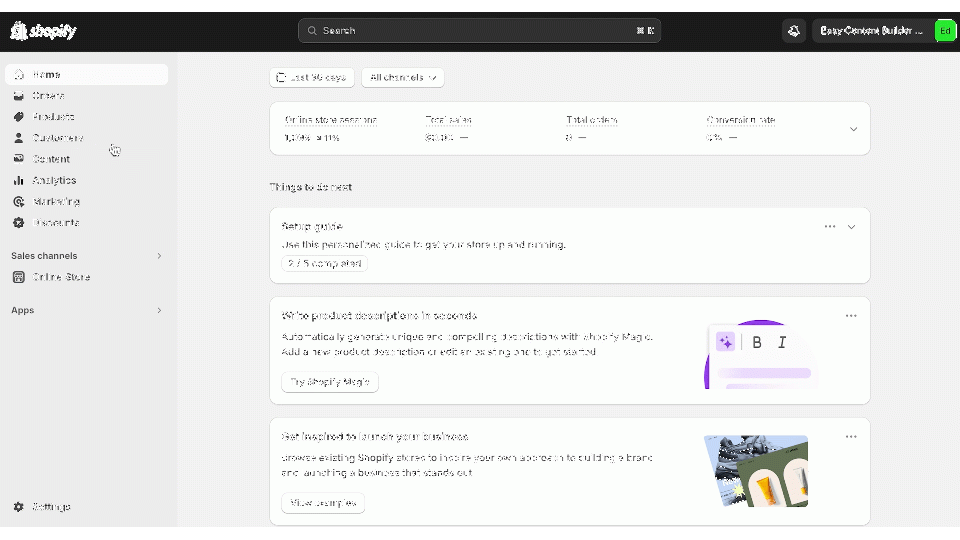
This video demonstrates how to assign a template to multiple products at once. | |||
[[File:Ecb assign multi product template.gif|frameless|960x960px]] | |||
{{Note|'''Note''': The bulk editing feature for blog posts and pages has been discontinued. Therefore, please refer to the guide on how to assign a template to individual products in order to apply a template to blog posts or pages.|inline}} | |||
==Next Steps== | |||
=====Add Sections===== | |||
Now that you've added the first template using Easy Content Builder, it's time to begin adding sections to that template. Find out [[Add_section_settings|how to add your first section here]]. | |||
Latest revision as of 07:25, 16 June 2025
Who is this guide for?
Anyone looking to create a custom template (for Product, Blog Post, or Store Pages) and apply it to multiple pages in bulk.
Template basics
Templates are saved combinations of sections and settings that control the look, layout, and content of your store's pages. What templates and sections are available depends on the theme you use.
How to check which templates are applied to which pages?
- Option 1: In the theme editor, you can find which templates are applied to which pages
- Option 2: Navigate to the specific page (product, collection, page, or blog post) in your Shopify admin, and check the bottom right section labeled Theme Template.
You can customize this default template through our app by following these steps:
1. Go to your Shopify admin and select Themes (under Sales Channel) > Click Customize next to your current theme to open the Theme Editor.
2. In the Theme Editor, use the template drop-down to select Product > Default Product.
3. Add any sections you want to this template.
How to create a template
Step overview:
- Create a template.
- Assign a template to product.
- Assign a template to multiple products in bulk.
- Add new sections to the template.
- You can use the same steps above to create a template for all page types: Product, Article, or Store page.
Create a Blank template or select a Prebuilt one
- Click Apps > Easy Content Builder > Browse Templates.
- Find and select a prebuilt template.
- Create a Blank template: If you want to create a blank template from scratch, click "Add Blank Template" instead of choosing a prebuilt option.
- Set the template name.
- Create a template.
- Note 1: Choose Template: You have the option to start with a Blank template or use a pre-made template, which includes pre-built sections created by Easy Content Builder.
- Note 2: The template name: The template name should be between 3-15 characters - only letters, numbers, underscores and hyphens are allowed.
- After creating a template using the video above, you will be directed to your Shopify theme editor. From there, you can begin adding sections to the template you've just created. You can learn how to add a section here.
How to preview your Template with a specific page
After creating a new template, you can preview it in the Theme Editor with any specific page.
Click the Change button in the preview section. Depending on your template type (Product, Page, or Blog Post), Shopify will provide a list of relevant pages to choose from. Once you select a page, you can preview your new template in your Theme Editor accordingly.
How to assign a template to one product
- Open the Products page.
- Find and select a product you want to assign the new template.
- Edit the product.
- Assign the template to the product.
This video guides how to assign a template to a single product, and you can follow the same steps to assign a template to your blog post or store page.
How to assign a template to multiple products in bulk
- Open the Products page
- Find and select products you want to assign the new template.
- Click on the Bulk Edit button from the toolbar.
- On the Bulk Editor screen > Click the Columns button > Select the "Template" column.
- Assign the new template to your chosen products.
- Save changes.
This video demonstrates how to assign a template to multiple products at once.
Next Steps
Add Sections
Now that you've added the first template using Easy Content Builder, it's time to begin adding sections to that template. Find out how to add your first section here.


