Create Template Apply to Multiple Pages: Difference between revisions
From Posstack.com Documentation
m (→Steps:) |
m (→Steps:) |
||
| Line 13: | Line 13: | ||
:{{Note|'''Note 1: Choose Template''' | :{{Note|'''Note 1: Choose Template''': You have the option to start with a Blank template or use a pre-made template, which includes pre-built sections created by Easy Content Builder.|inline}} | ||
You have the option to start with a Blank template or use a pre-made template, which includes pre-built sections created by Easy Content Builder.|inline}} | :{{Note|'''Note 2: The template name''': The template name should be between 3-15 characters - only letters, numbers, underscores and hyphens are allowed.|inline}} | ||
:{{Note|Note 2: The template name | |||
The template name should be between 3-15 characters - only letters, numbers, underscores and hyphens are allowed.|inline}} | |||
*Then, you will be automatically directed to your Shopify theme editor. Here, you can start adding content blocks to the template you’ve just created. | *Then, you will be automatically directed to your Shopify theme editor. Here, you can start adding content blocks to the template you’ve just created. | ||
Revision as of 12:59, 24 May 2024
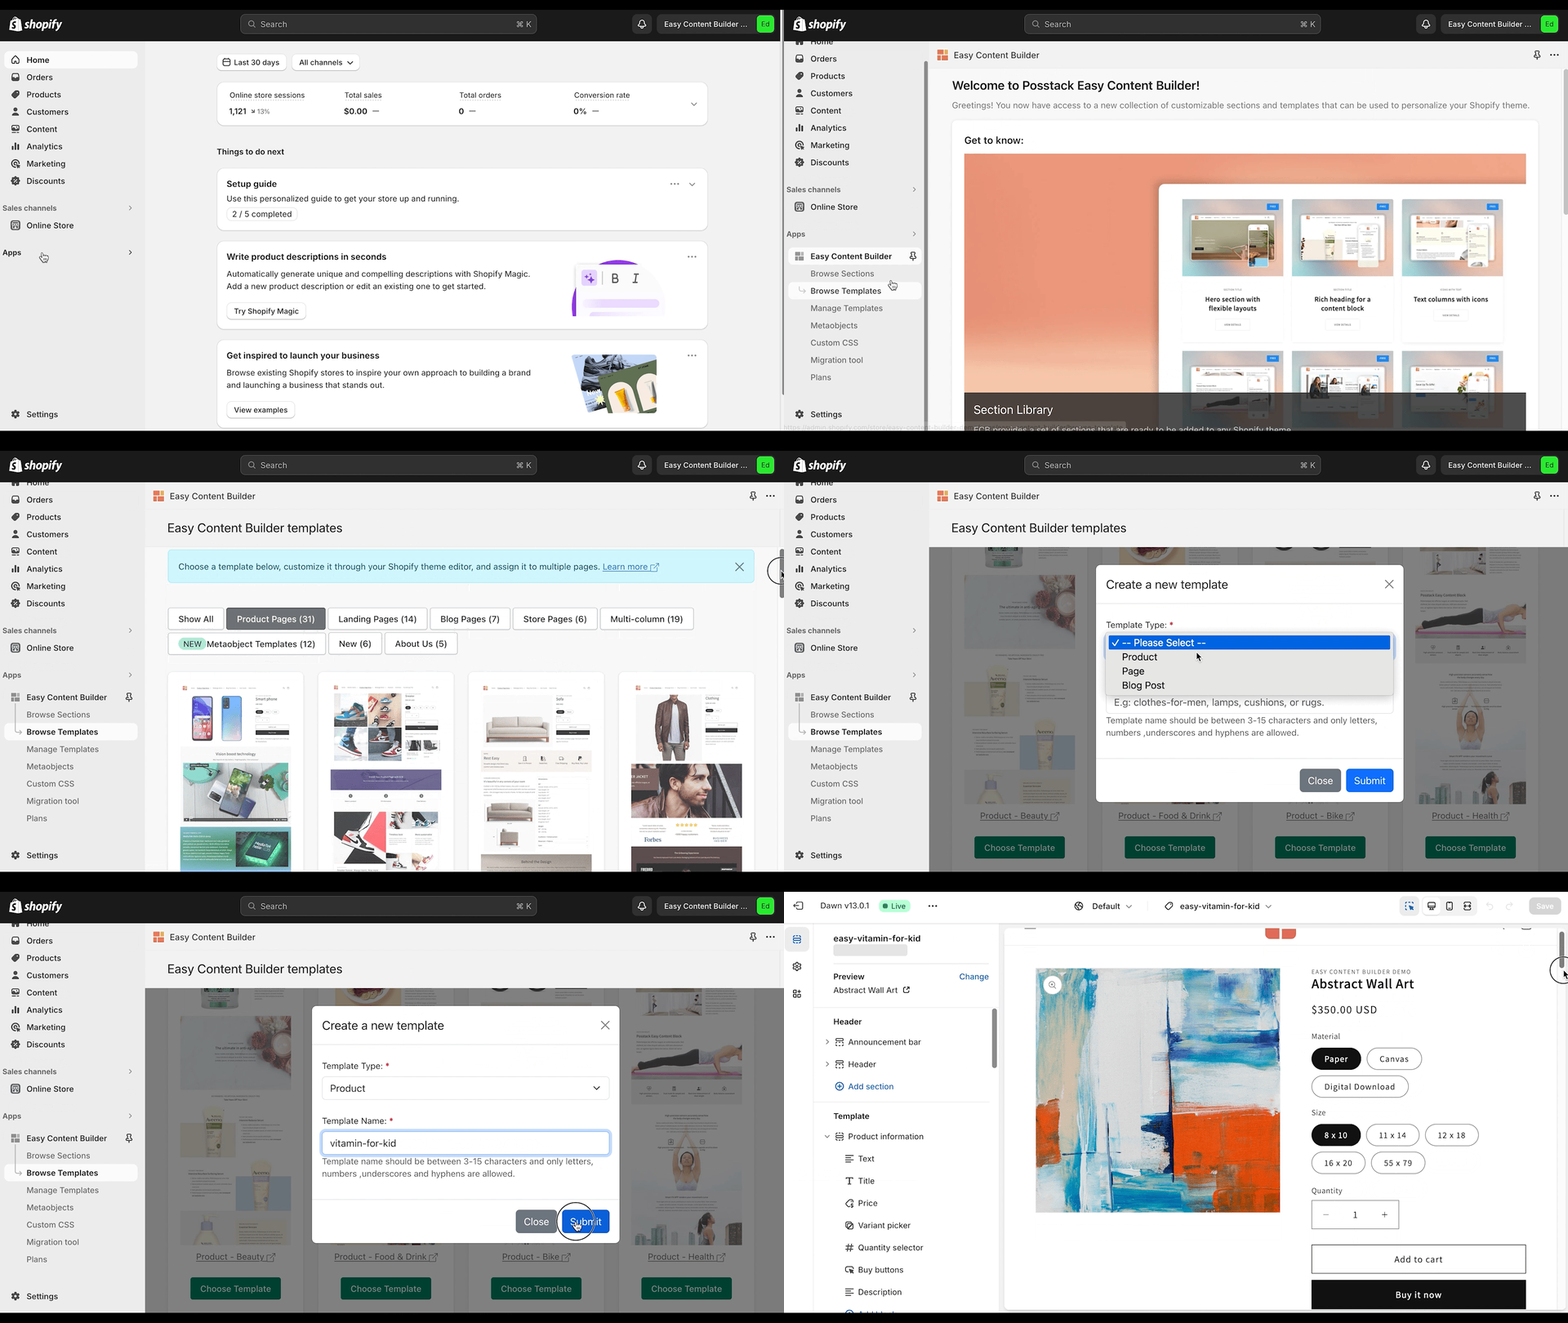
This guide explains how to create a template (for Product, Blog Post, or Store Pages) and apply it to multiple pages in bulk.
The setup steps are the same for all page types: Product, Article, or Store page.
Steps:
- Open Browse Template page
- Find and select a Prebuilt-template.
- Set the template name.
- Create a template.
- Assign template to products.
Tutorial Video: How to create a template
- Note 1: Choose Template: You have the option to start with a Blank template or use a pre-made template, which includes pre-built sections created by Easy Content Builder.
- Note 2: The template name: The template name should be between 3-15 characters - only letters, numbers, underscores and hyphens are allowed.
- Then, you will be automatically directed to your Shopify theme editor. Here, you can start adding content blocks to the template you’ve just created.
Next Steps:
- Add, delete, and customize sections: Read the guide.
