Custom CSS: Difference between revisions
m (→Section scope) |
|||
| Line 25: | Line 25: | ||
* Use the '''Template''' drop-down menu to select a template. | * Use the '''Template''' drop-down menu to select a template. | ||
* Click the section that you want to add CSS to. | * Click the section that you want to add CSS to. | ||
* At the bottom of the section properties panel, click '''Custom CSS'''. | * At the bottom of the section properties panel, click '''Custom CSS'''.[[File:Ecb-css-scope.jpg|frameless|800x800px]] | ||
* Add your code and click '''Save'''. | * Add your code and click '''Save'''. | ||
Revision as of 03:23, 7 December 2023
Getting Started
Check out this step-by-step video guide to learn how to customize your Shopify theme using the Custom CSS feature that Easy Content Buider provides.
We will walk you through some small tweaks like changing the Primary/Secondary Background colors, font size, and creating rounded Buttons on the Shopify Refresh theme.
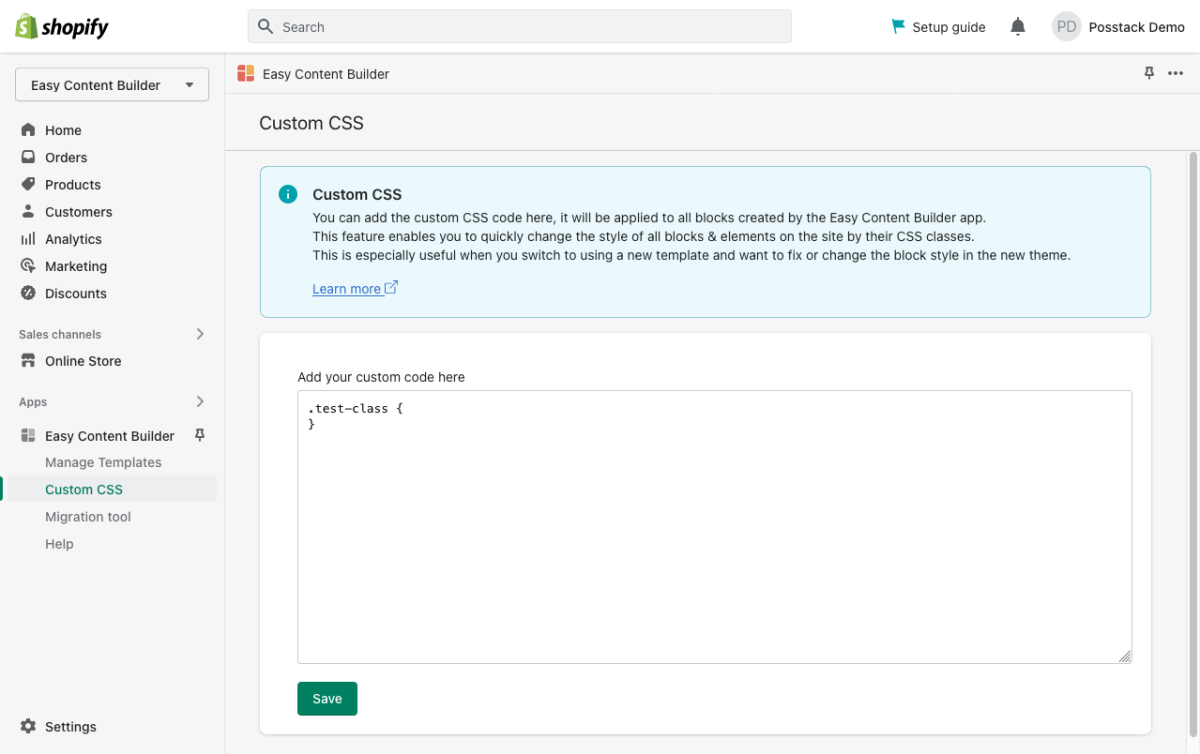
Custom CSS
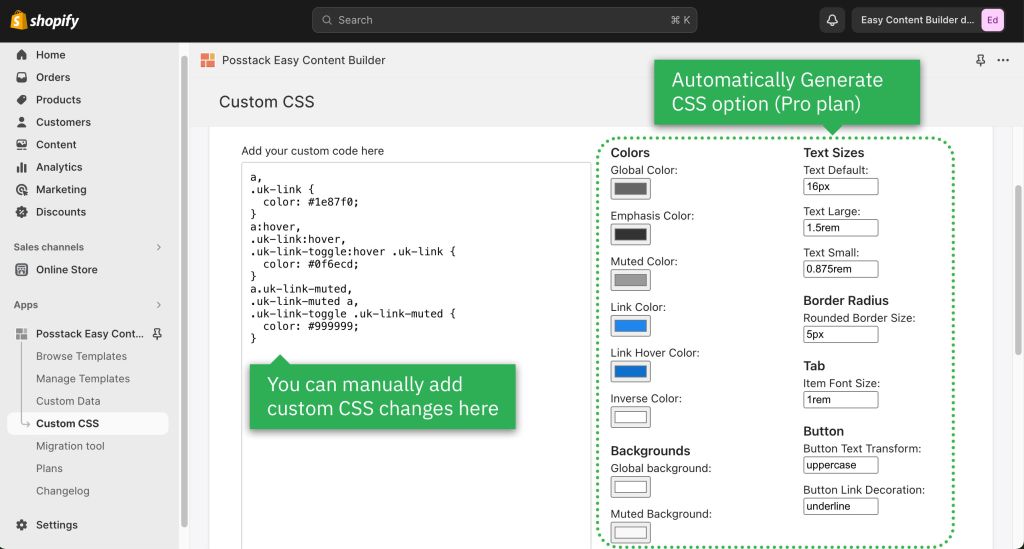
You can manually add custom CSS changes here that will be applied to all blocks created by the Easy Content Builder app. Customizing your CSS requires some familiarity with CSS and HTML though.
This feature allows you to make quick style changes to all blocks & elements on the site using their CSS classes. This is especially helpful when you switch to a new template and want to fix/change blocks’ style in the new theme.
Understand Custom CSS scopes
App scope
When adding custom CSS under the Easy Content Builder > Custom CSS, the CSS is scoped to all pages created using Easy Content Builder.
Section scope
If you want to add custom CSS to a specific section of your theme, then the CSS is scoped to only that section. Here're the steps to add Custom CSS to a section:
- From your Shopify admin, go to Online Store > Themes.
- Next to the theme that you want to edit, click Customize.
- Use the Template drop-down menu to select a template.
- Click the section that you want to add CSS to.
- At the bottom of the section properties panel, click Custom CSS.

- Add your code and click Save.
Theme scope
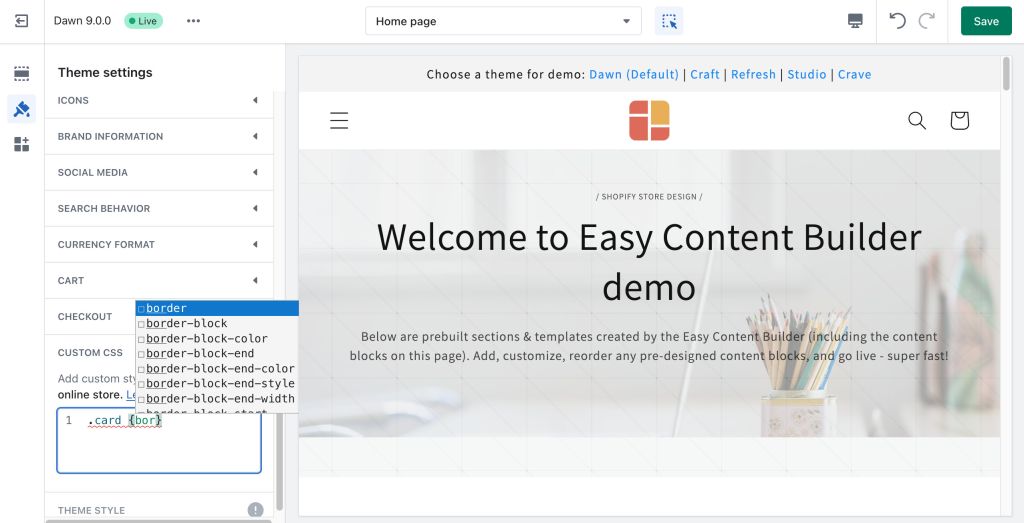
If you want to add custom CSS to your entire theme that will be applied to all pages (except the Checkout page), follow these steps:
- From your Shopify admin, go to Online Store > Themes.
- Next to the theme that you want to edit, click Customize.
- Click Theme settings.
- Click Custom CSS.
- Add your code and click Save.
Custom Theme Style (Pro version only)
In addition to the standard Custom CSS feature, the Easy Content Builder Pro version has a handy option to make significant adjustments to your theme without coding - Automatically Generate CSS option.
Currently, it only supports Color customization - you can expect other types of customization in the coming time.
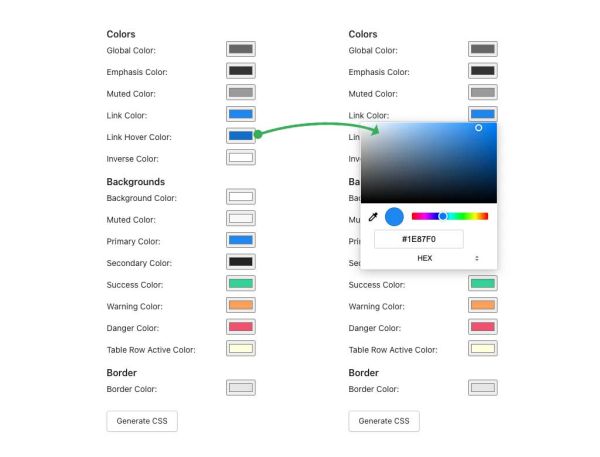
You can change the color for borders, backgrounds, or text colors of the ECB sections to fit your theme style.
Then, hit the Generate CSS button (the new CSS code - from your selected color settings - applied to the ECB blocks will be automatically generated and filled in the Custom CSS field).
Next, hit the Save button and clear the browser cache to see the changes in your storefront.
Extra note: You can also copy the generated Custom CSS to your theme (supposed that your theme supports adding custom CSS code). We take the Dawn theme as an example; you can add the generated Custom CSS to the Custom CSS section via Shopify Theme Editor:


