Create Template Apply to Multiple Pages
From Posstack.com Documentation
This guide explains how to create a template (for Product, Blog Post, or Store Pages) and apply it to multiple pages in bulk.
The setup steps are the same for all page types: Product, Article, or Store page.
Steps:
- From your Shopify admin, click Apps > Easy Content Builder.
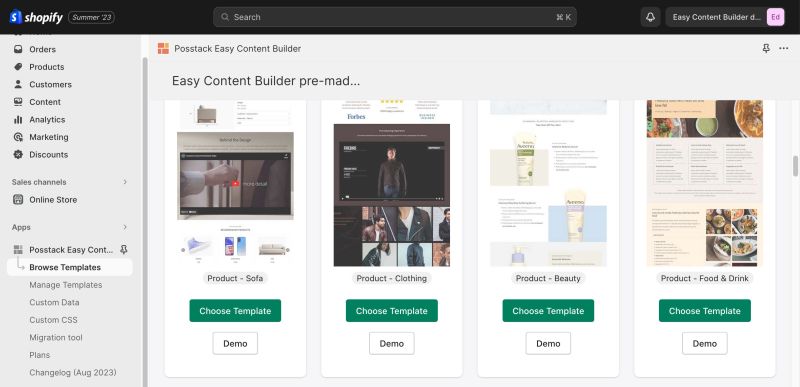
- From the Easy Content Builder dashboard, click Browse Templates.
- Find a prebuilt template that you want to use, and then click Choose Template.
- You can start with a Blank template or add a premade template. Templates are a collection of sections that are pre-built by Easy Content Builder. Once you add a template to your theme, you can add your images and copy to fit your brand. You can easily edit, reorder, or remove any section within that template to create your ideal page.
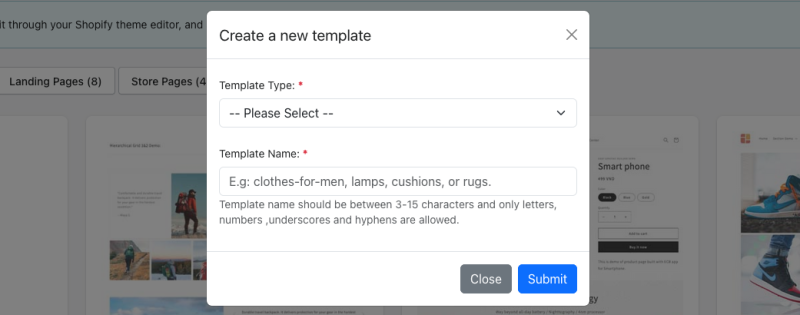
- Next, select the template type (Product, Blog Post, Page) and enter the template name
- The template name should be between 3-15 characters - only letters, numbers, underscores and hyphens are allowed.

- From your Shopify admin, click Apps > Easy Content Builder.

- From the Easy Content Builder dashboard, click Browse Templates.

- Find a prebuilt template that you want to use, and then click Choose Template.
- You can start with a Blank template or add a premade template. Templates are a collection of sections that are pre-built by Easy Content Builder. Once you add a template to your theme, you can add your images and copy to fit your brand. You can easily edit, reorder, or remove any section within that template to create your ideal page.

- Next, select the template type (Product, Blog Post, Page) and enter the template name
- The template name should be between 3-15 characters - only letters, numbers, underscores and hyphens are allowed.

- Then, you will be automatically directed to your Shopify theme editor. Here, you can start adding content blocks to the template you’ve just created.
Next Steps:
- Add, delete, and customize sections: Read the guide.