Section Settings: Difference between revisions
mNo edit summary |
|||
| Line 49: | Line 49: | ||
=== 2-col with Flexible Col Width === | === 2-col with Flexible Col Width === | ||
Below is a 2-column section we built on our [https://easy-content-builder-demo.myshopify.com/products/vitamin-d-boost Nutrition template demo]: | |||
[[File:Ecb-2-col- | [[File:Ecb-2-col-example.png|border|frameless|1024x1024px]] | ||
Here is the list of content blocks and associated configurations for this 2-col section: | |||
[[File:2-col-blocks.png|border|frameless|1024x1024px]] | |||
'''Step 1''': Add '''[[Block Section Settings|Section Settings]]''' block and configure as follows: | |||
[[File:2-col-section-settings.png|border|frameless|1024x1024px]] | |||
* Desktop Layout: ''Two Col: First Block Left, Others Right''. | |||
<ref>: NOTE: | |||
:* ''''First Block Left'''<nowiki/>' refers to the main content block you want to show on the left column. Drag any block you want to reorder on top of other blocks to keep it in the First Block position. | |||
:* ''''Others Right'''<nowiki/>' means all other blocks will be displayed on the right column.</ref> | |||
* Mobile Layout: One Column | |||
* Main Column Width: By default, you can start with a 50/50 layout for image and text elements or change this ratio by changing the '''Main Column Width''' value. | |||
* Background color: Use the Gradient color picker or enter the value of the new color in the CSS Code field. | |||
* Padding top: 50px | |||
* Padding bottom: 50px | |||
'''Step 2''': Add the first '''[[Block Section Title|Section Title]]''' block and fill in the Title, Tagline, and Description as you wish. | |||
[[File:2-col-section-title1.png|border|frameless|1024x1024px]] | |||
[[File: | '''Step 3''': Add the second '''Section Title''' block and fill in the Tagline as per our demo (You can enter other content as you wish). | ||
[[File:2-col-section-title2.png|border|frameless|1024x1024px]] | |||
'''Step 4''': Add the '''[[Block Icons With Text|Icon With Text]]''' block with the configurations below: | |||
[[File:2-col-icons-w-text.png|border|frameless|1024x1024px]] | |||
* Image Position: Left | |||
* Text Alignment: Left | |||
* Item Margin: Small | |||
* CSS Classes: '''''image-width-24''''' | |||
* Items per row on Desktop: 2 | |||
* Then, fill in the Item Settings with Title and SVG icons. | |||
'''Step 4''': Add a [[Block Buttons|'''Button''' block]] with the configurations below: | |||
[[File:2-col-buttons.png|border|frameless|1024x1024px]] | |||
* Text Alignment: Left | |||
* Fill in the Button label, style, URL, and size. | |||
* Margin: Large | |||
=== 2-col with Blank Sections === | === 2-col with Blank Sections === | ||
Revision as of 03:03, 29 August 2023
Easy Content Builder uses Section Settings as a special block to determine your ideal layouts (1-column, 2-columns, and 3-columns) within the section itself.
Create a Section Settings
When completing the steps in the section Creating templates, you should be redirected to the Theme Editor. Here you can start adding a Section Settings block to the template you’ve just created.
Each template can have many sections. In each section, you can create a Section Settings block to control the layout for that specific section.
Note: You can also open the Theme Editor of the specific template directly from the Easy Content Builder dashboard. Simply go to Shopify admin > Apps > Easy Content Builder > Manage Templates > select the template you want to edit and click Customize.
Create a new Section Settings
- From your Shopify admin, click Apps > Easy Content Builder.
- From the Easy Content Builder dashboard, click Manage Templates. Find the template that you want to edit, and then click Customize.
- From the theme editor, click + Add Section in the sidebar.
Tips: While using the preview inspector, you can also add sections to the template directly from the preview window.
- Scroll down the list of available blocks prebuilt by the Easy Content Builder and click Section settings.
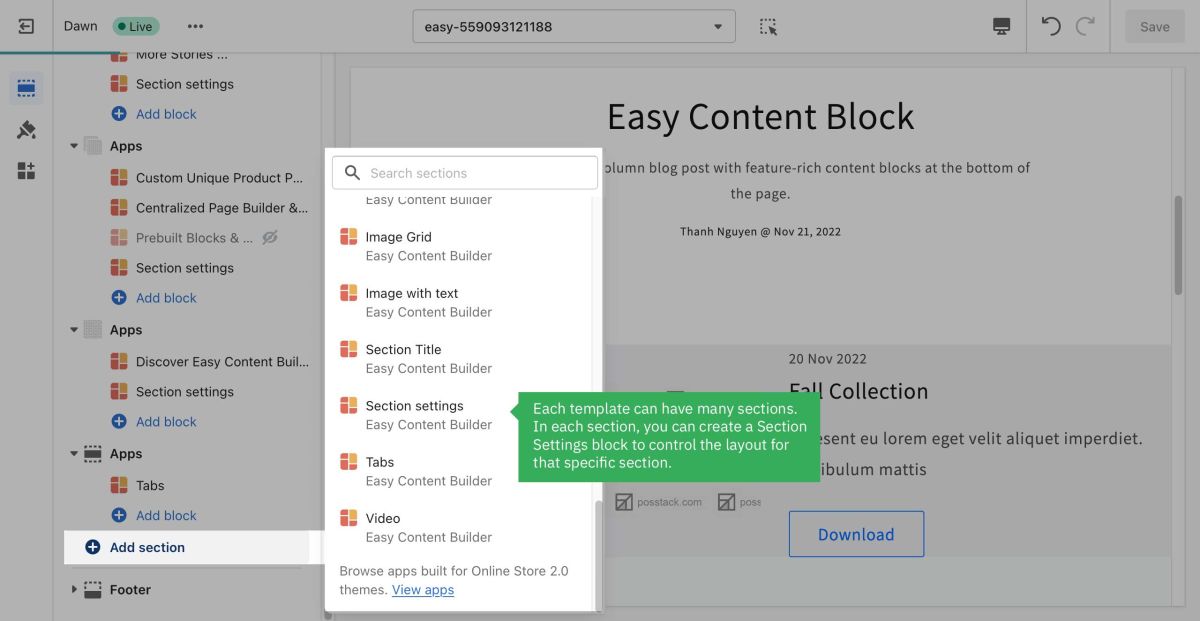
- Next, click on Section settings to open the section setting panel and configure the layout to your needs. The section settings will appear on the sidebar. Click Save to apply any changes you might make.
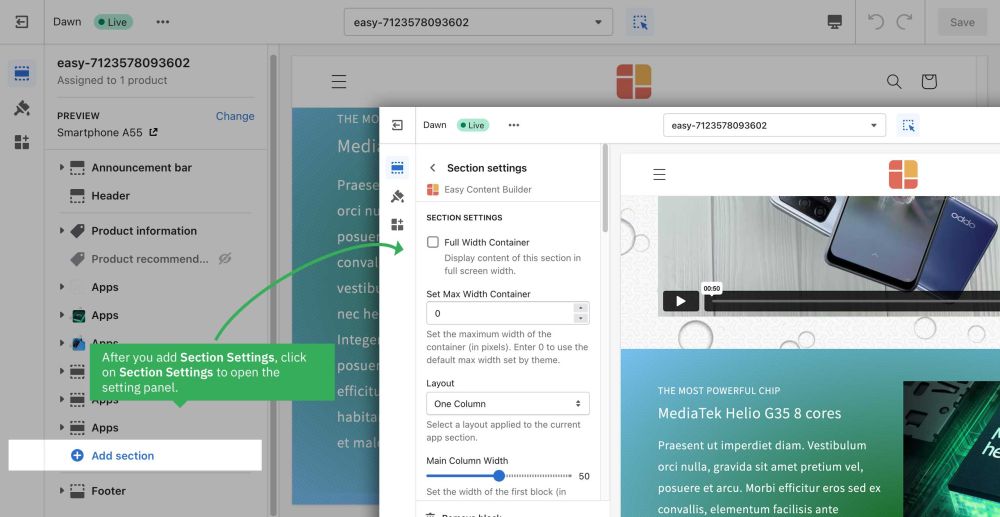
Note: To learn more about the configurations in the Section Settings, please refer to section ECB Block Settings > Block: Section Settings.
Reorder the Section Settings
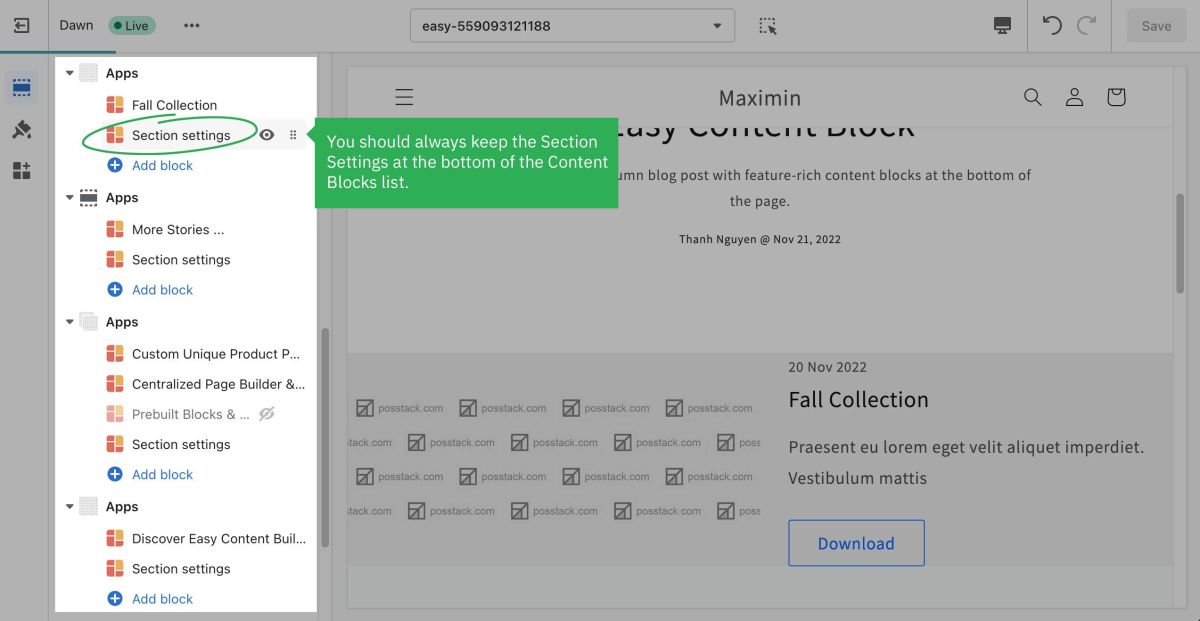
Even though you can click and drag the ⋮⋮ icon next to the Section Settings to rearrange the block on your page, you should always keep the Section Settings at the bottom of the Content Blocks list that you might add to a section.
Next Steps
Now you can start adding content blocks (Please refer to the section Add Block for more details)
Multi-column Layout Setup
With Easy Content Builder, you define the multiple-column layouts on an individual section level, and Section Settings is where you define your column layouts.
Below are the steps to create 1-column and 2-column layouts. You can apply the same tweak to create blank space in 3-column or 4-column layouts.
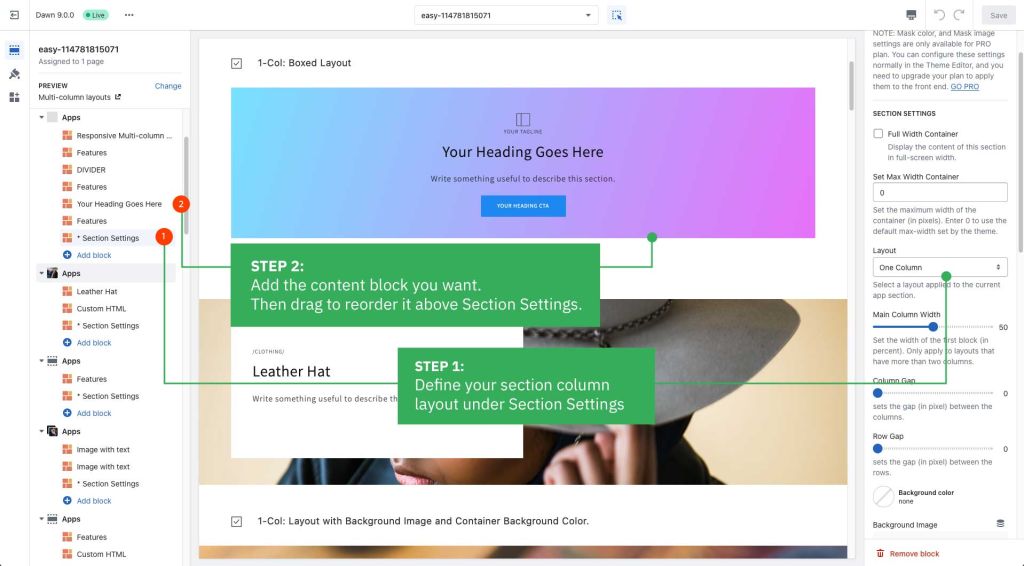
1-col boxed layout
Here are the configuration steps:
How it looks on the storefront:
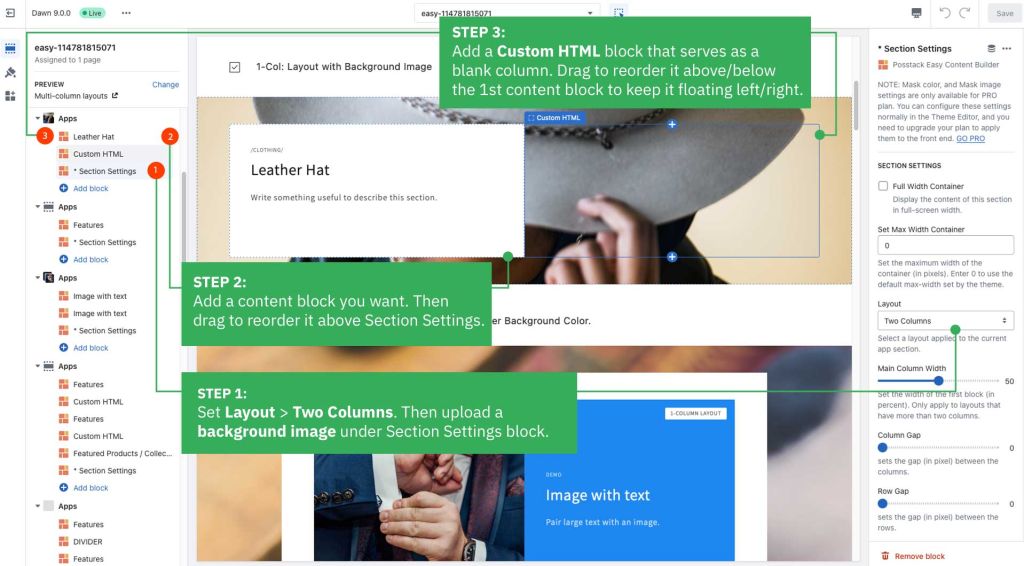
1-col with Background Image
Here are the configuration steps:
How it looks on the storefront:
2-col with Flexible Col Width
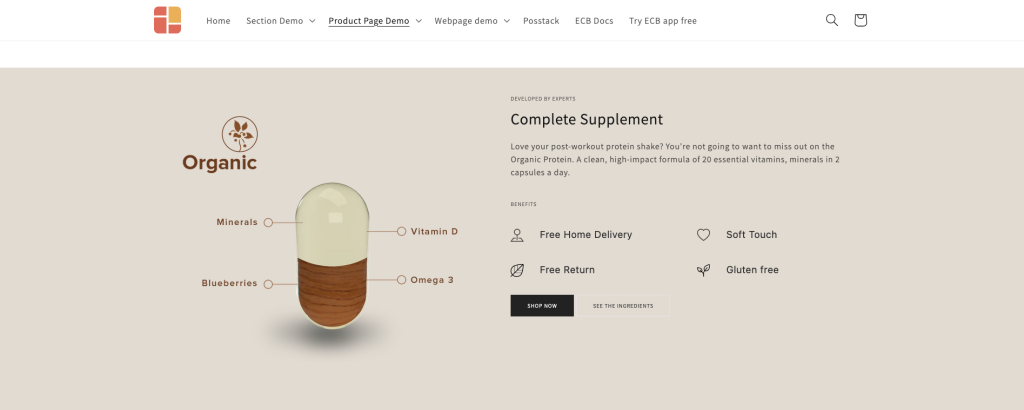
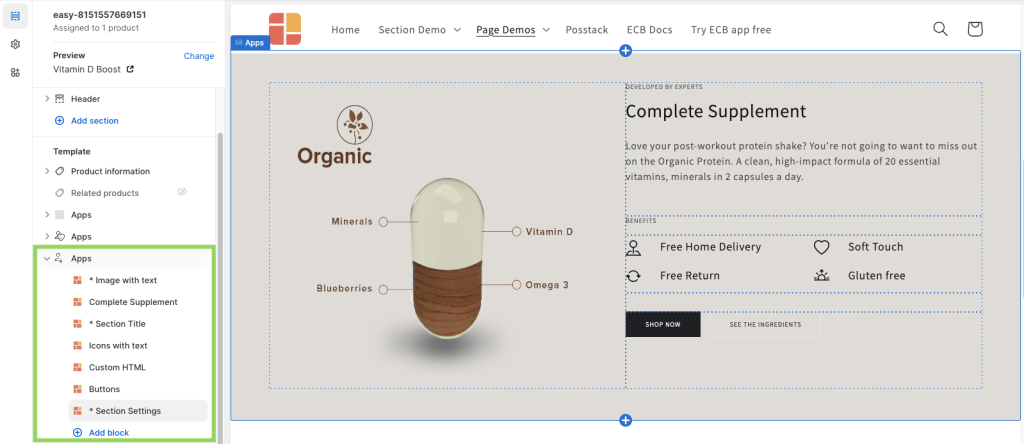
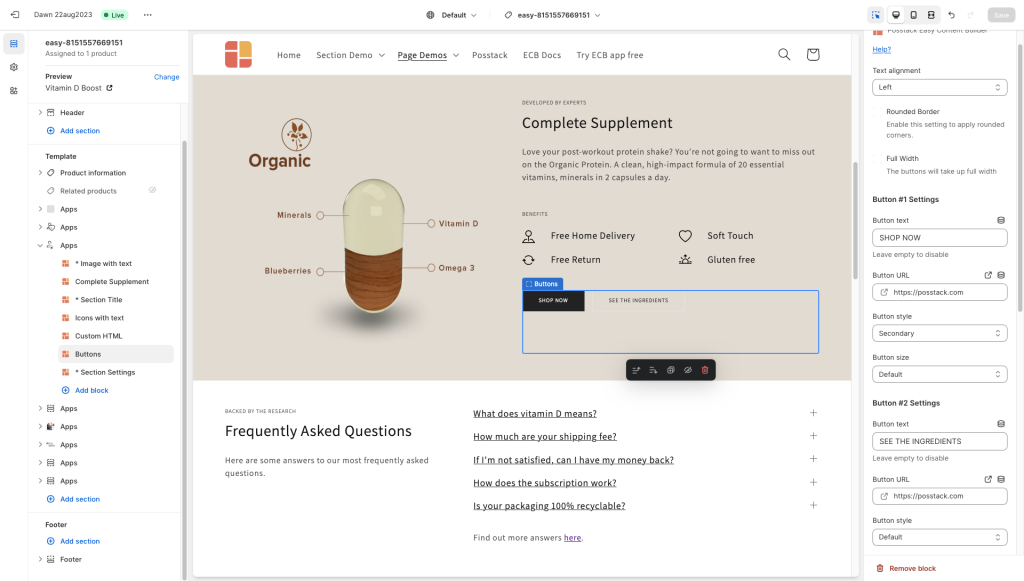
Below is a 2-column section we built on our Nutrition template demo:
Here is the list of content blocks and associated configurations for this 2-col section:
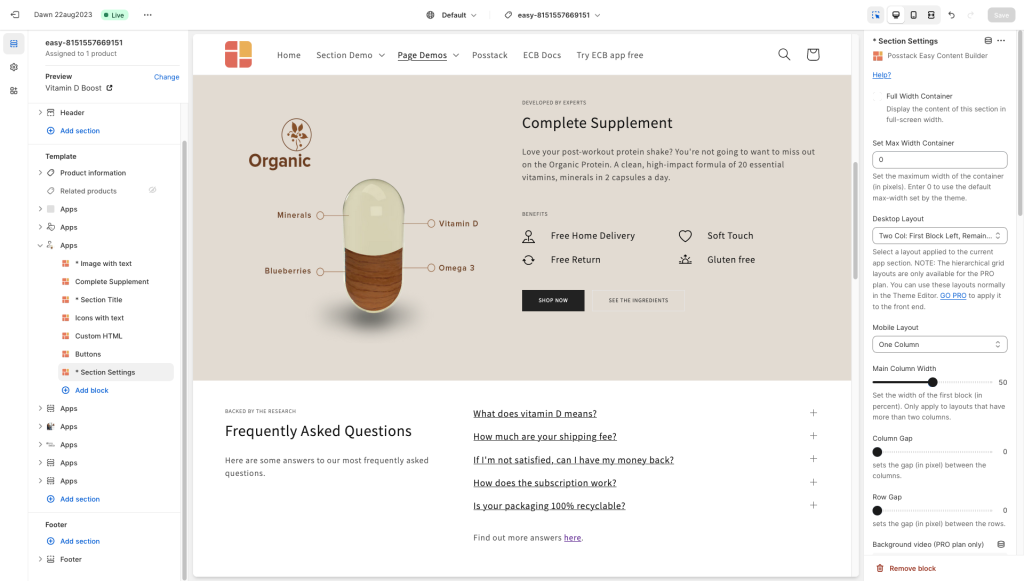
Step 1: Add Section Settings block and configure as follows:
- Desktop Layout: Two Col: First Block Left, Others Right.
<ref>: NOTE:
- 'First Block Left' refers to the main content block you want to show on the left column. Drag any block you want to reorder on top of other blocks to keep it in the First Block position.
- 'Others Right' means all other blocks will be displayed on the right column.</ref>
- Mobile Layout: One Column
- Main Column Width: By default, you can start with a 50/50 layout for image and text elements or change this ratio by changing the Main Column Width value.
- Background color: Use the Gradient color picker or enter the value of the new color in the CSS Code field.
- Padding top: 50px
- Padding bottom: 50px
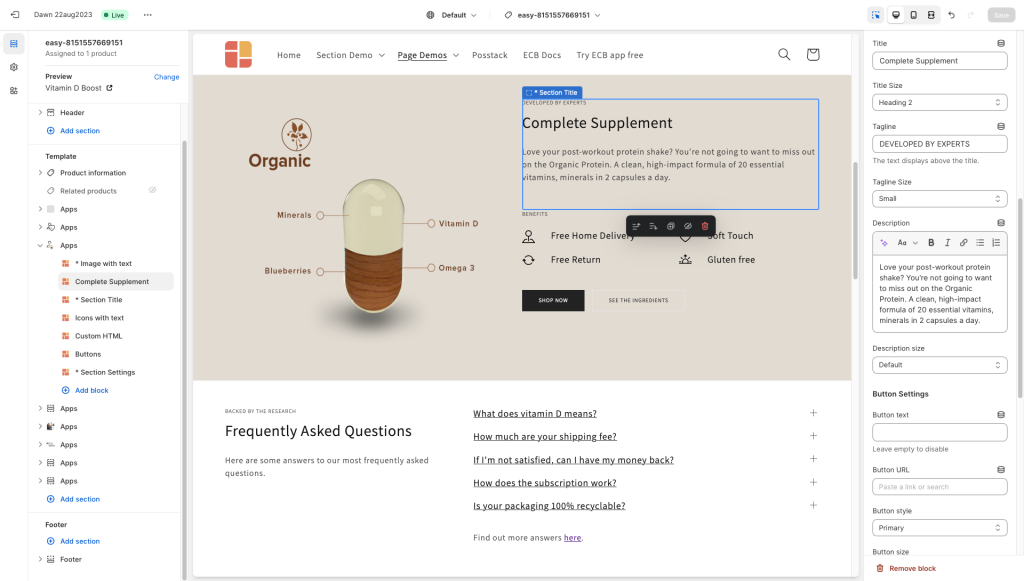
Step 2: Add the first Section Title block and fill in the Title, Tagline, and Description as you wish.
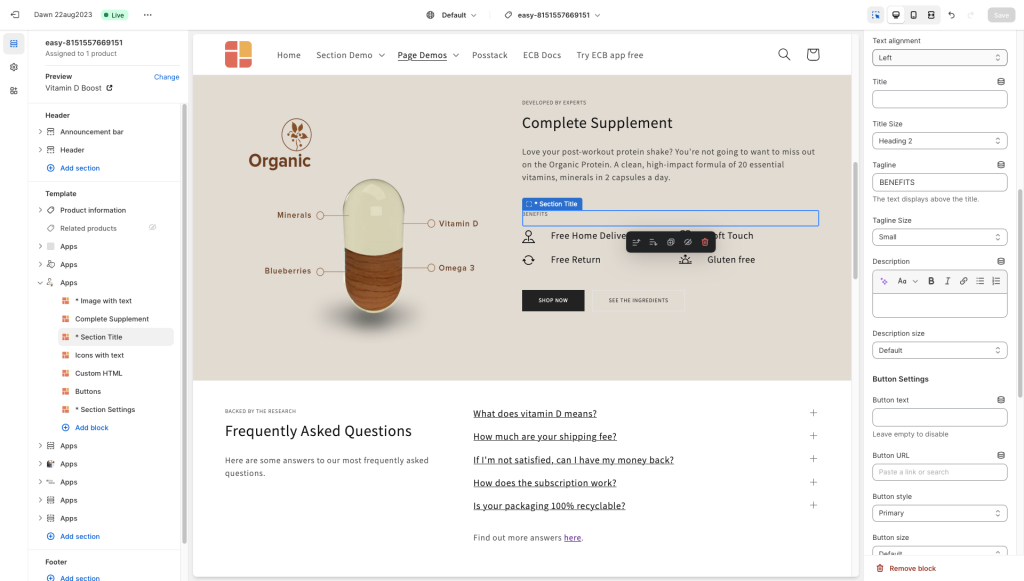
Step 3: Add the second Section Title block and fill in the Tagline as per our demo (You can enter other content as you wish).
Step 4: Add the Icon With Text block with the configurations below:
- Image Position: Left
- Text Alignment: Left
- Item Margin: Small
- CSS Classes: image-width-24
- Items per row on Desktop: 2
- Then, fill in the Item Settings with Title and SVG icons.
Step 4: Add a Button block with the configurations below:
- Text Alignment: Left
- Fill in the Button label, style, URL, and size.
- Margin: Large
2-col with Blank Sections
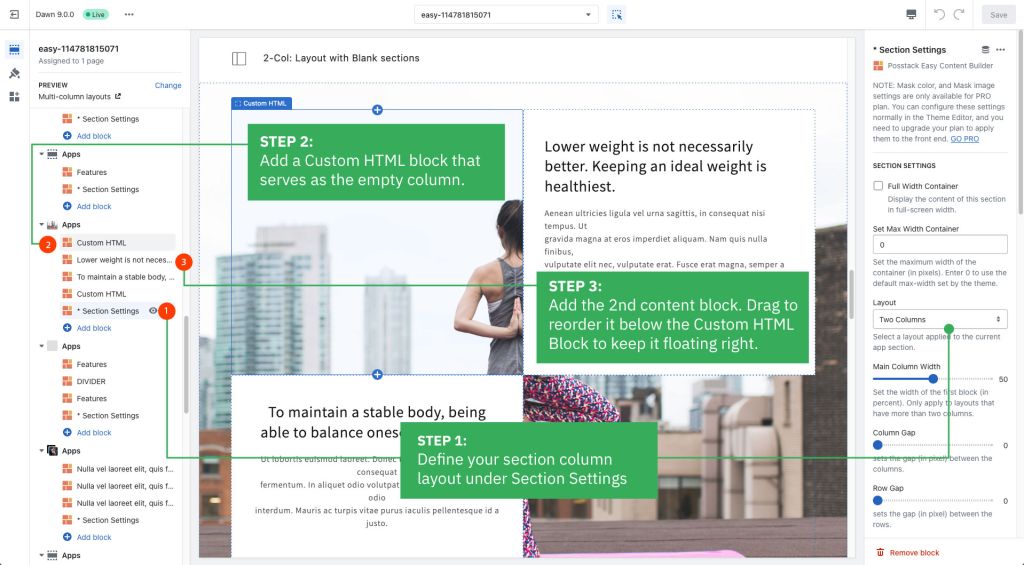
Here are the configuration steps:
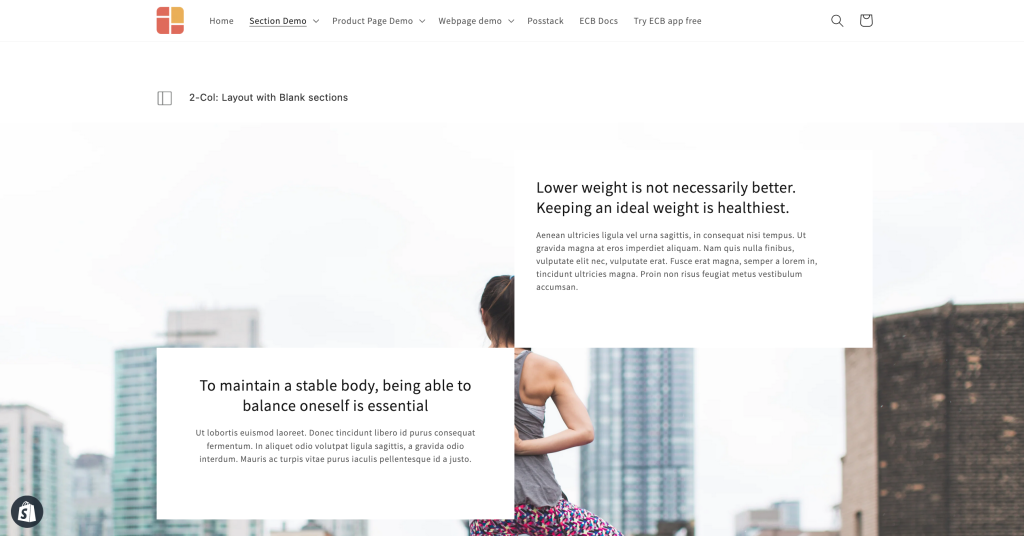
How it looks on the storefront:
