Create MetaObjects
Metaobjects are data containers that help you define and create custom structured data for your store, such as size charts, FAQs, ingredient lists, recipes, specifications, etc.
Easy Content Builder app helps you create metaobjects faster for 3 types of content:
- Icons with text (Type: ecb_icons_with_text)
- Tabs (Type: ecb_tabs) - coming soon
- Accordions (Type: ecb_accordions) - coming soon
Once you add the metaobjects mentioned above, the ECB app automatically creates metafield definitions that reference each metaobject respectively:
- Product
- Page
- Blog post
How to create a metaobject
Step 1: Grant the Access Scope for Creating Metaobject Definitions by updating the App permission: [UPDATE APP]
This step is only needed if you install an old version of the Easy Content Builder.
Please discard this step for those who just installed the Easy Content Builder app.
- Note: If your store has multiple staff members, make sure you assign the right permission for staff to work on the metaobjects.
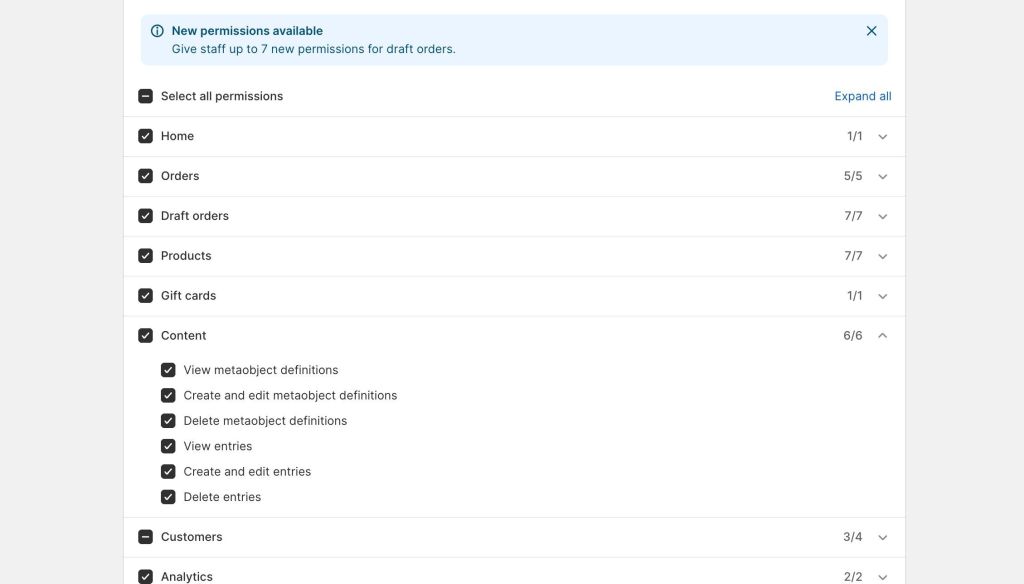
- Otherwise, your staff can not add entries when working with the metaobjects.
Step 2: Create Metaobjects
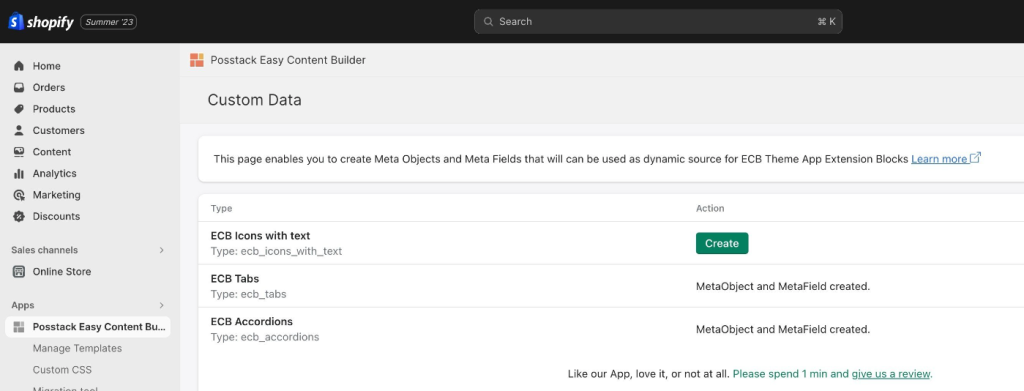
- From your Shopify admin, navigate to Apps > Posstack Easy Content Builder > Custom Data.
- Click on Create next to the desired content type (Icons With Text, Tabs, Accordions). Once created, you should see the message Metaobject and Metafield created:
- And all metafields associated with the above-mentioned metaobjects are automatically created too. You can check those metafields by following these steps:
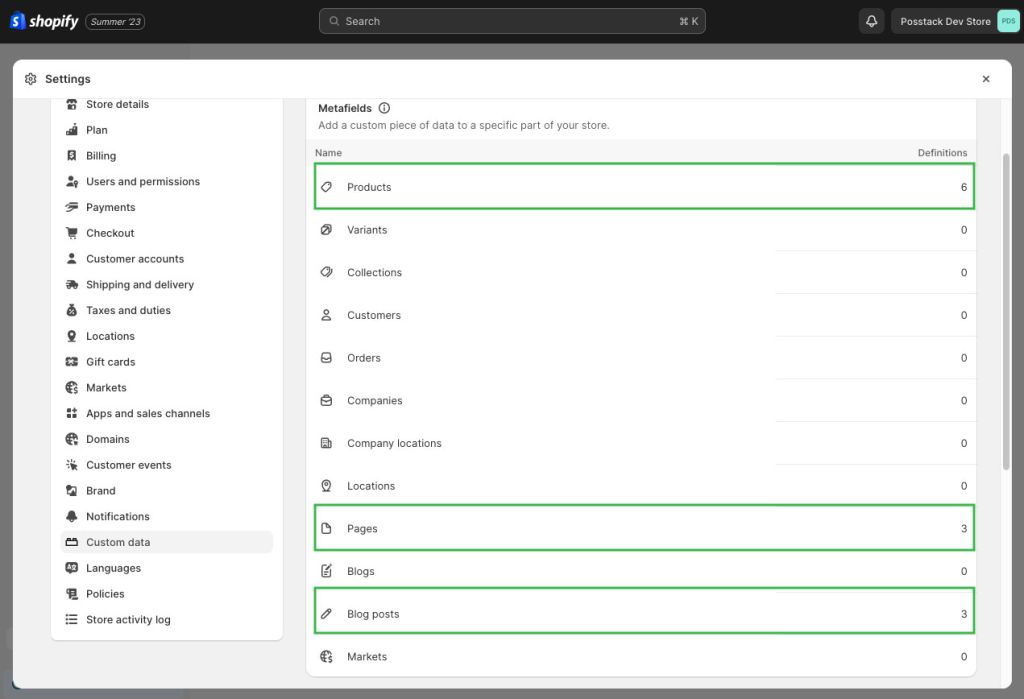
- In your Shopify admin, click Settings > Custom data
- You should see 3 metafields Products, Pages, Blog Posts:
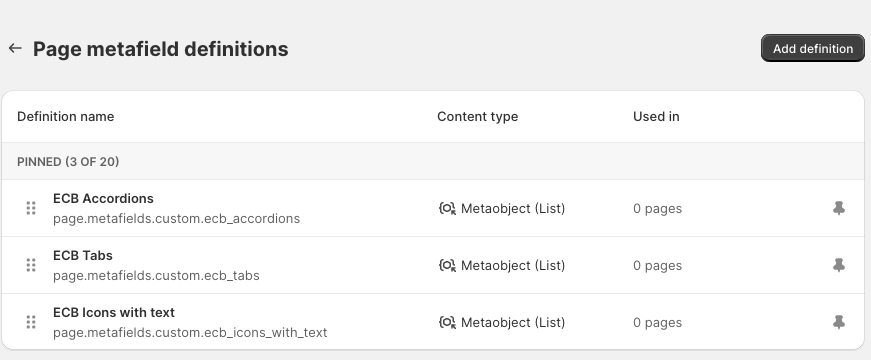
- Click on each metafield Products, Pages, or Blog Posts to see the metafield definitions:
Step 3: Create entries for the Metaobjects
- From your Shopify admin, select the part of your store that you want to add a metaobject to. For example, Products (Easy Content Builder now supports metaobjects for Products, Pages, Blog Posts).
- Click the name of a product you want to edit.
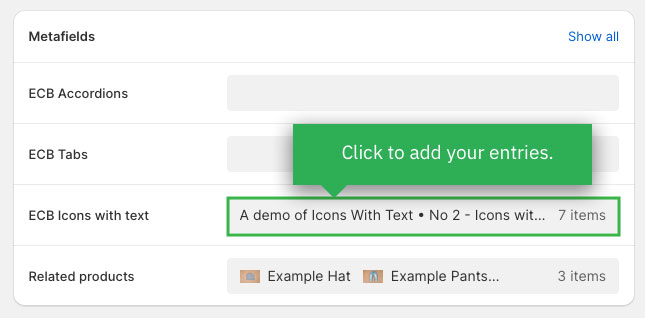
- In the Metafields section, click on the form field to add an entry (ECB Accordions, ECB Tabs, or ECB Icons With Text depending on which metaobjects you created in Step 2)
- Next, click Select Entry > Create New Entry and complete the fields for your entry. Once done, click Save.
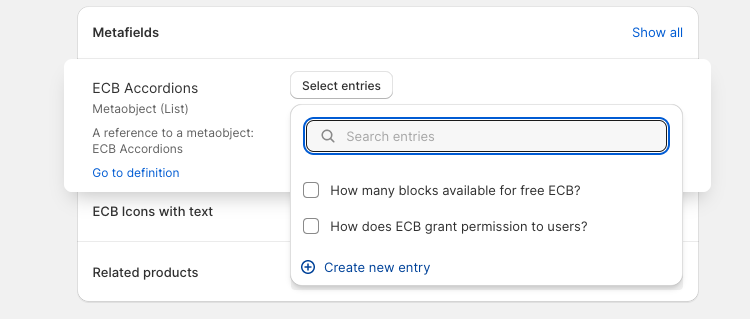
- To create other entries, you repeat the exact steps by clicking Select Entry > Create New Entry. If you have already created entries, simply click the checkboxes to determine which entries will be displayed on your storefront. Here is an example of metaobject entries we created for demo purposes:
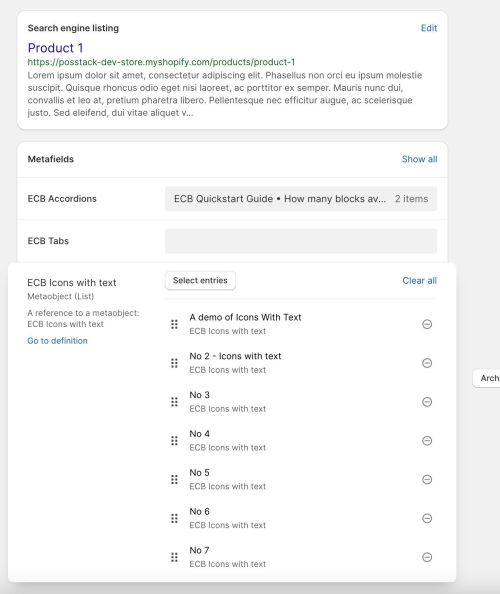
- Once done, click Save.
Step 4: Connecting metaobjects to your Online Store through dynamic sources
- From your Shopify admin, click Apps > Easy Content Builder
- From the Easy Content Builder dashboard, click Manage Templates.
- Then select the template that you want to edit and click Customize.
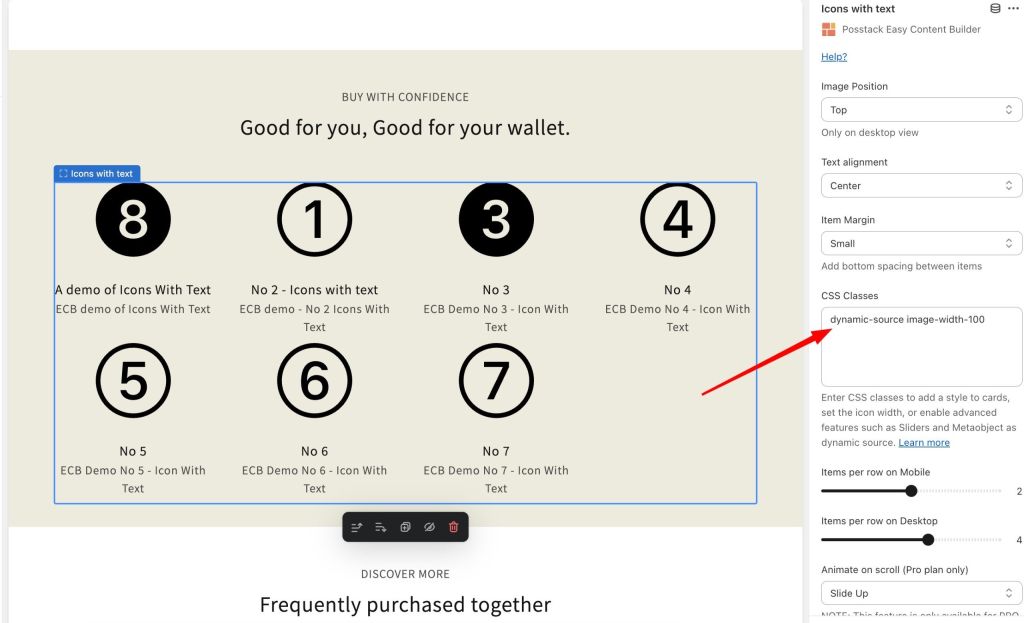
- From the Theme Editor, open the Icons With Text block where you want to edit. Then insert two classes into the CSS classes field: dynamic-source image-width-100 (replace 100 with the desired value for your icons' width).
Delete an entry
- In your Shopify admin, go to Content > Metaobjects.
- Click an entry that you want to delete.
- Click Delete to remove the entry.
Delete a metaobject
- In your Shopify admin, go to Apps > Easy Content Builder > Custom Data
- Click on Delete next to the metaobject that you want to delete.


