Add Sections
From Posstack.com Documentations
The Easy Content Builder app uses sections to create your desired layouts. You can add, reorder, delete, and hide these dynamic sections on every page template. You can further customize the section by editing its Settings.
Each section is made up of blocks that can also be reordered, added, and removed within that section to create an ideal layout of the section itself.
Create a section
Once you create a template by following the section Creating templates, you should be automatically redirected to the Theme Editor where you can start adding a new section to the template you’ve just created.
Note: You can also open the Theme Editor of the specific template from the Easy Content Builder dashboard. Simply go to Shopify admin > Apps > Easy Content Builder > Manage Templates > select the template you want to edit and click Customize.
To create a new section:
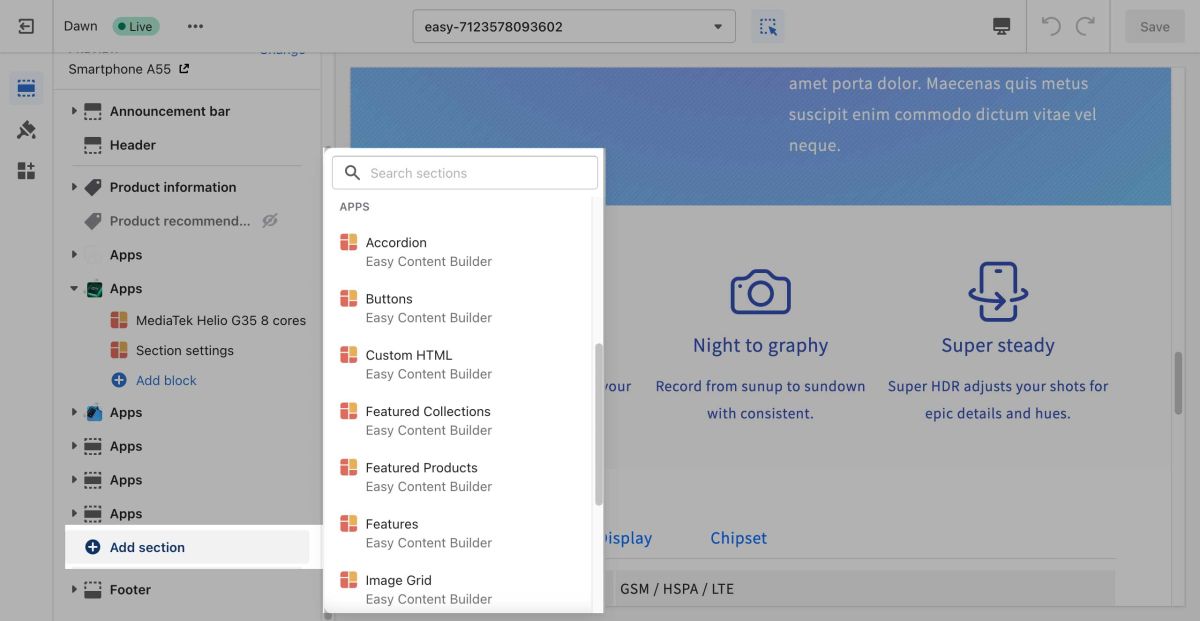
- From the theme editor, click + Add Section in the sidebar.
Tips: While using the preview inspector, you can also add sections to the template directly from the preview window.
- Scroll down the list of available blocks prebuilt by the Easy Content Builder and click Section settings.
- Next, click on Section settings to open the section setting panel and configure the layout to your needs. The section settings will appear on the sidebar. Click Save to apply any changes you might make.
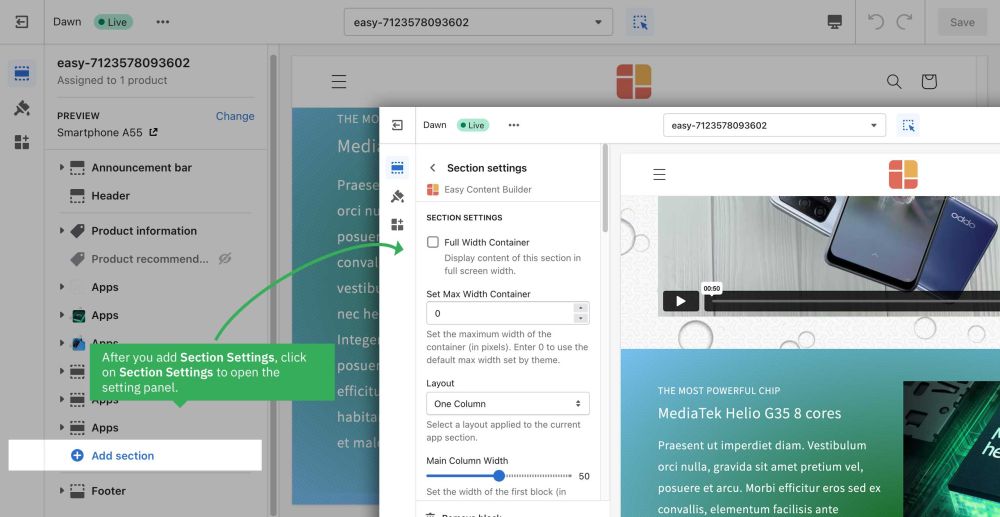


Note: To learn more about the configurations in the Section Settings, please refer to section ECB Block Settings > Block: Section Settings.
Next Steps:
Now you can start adding content blocks (Please refer to the section Add Block for more details)