Edit Template: Difference between revisions
From Posstack.com Documentations
No edit summary |
No edit summary |
||
| Line 1: | Line 1: | ||
After you create a Product/Page/Blog Post template by following the steps in the section [[Create Templates]], you will be automatically redirected to the Theme Editor where you can start editing the page. | After you create a Product/Page/Blog Post template by following the steps in the section [[Create Templates]], you will be automatically redirected to the Theme Editor where you can start editing the page. | ||
Another way to access | Another way to access the Theme Editor: | ||
* From your Shopify admin, click Apps > Easy Content Builder | * From your Shopify admin, click Apps > '''Easy Content Builder''' | ||
* From the Easy Content Builder dashboard, click '''Manage Templates'''. | * From the Easy Content Builder dashboard, click '''Manage Templates'''. | ||
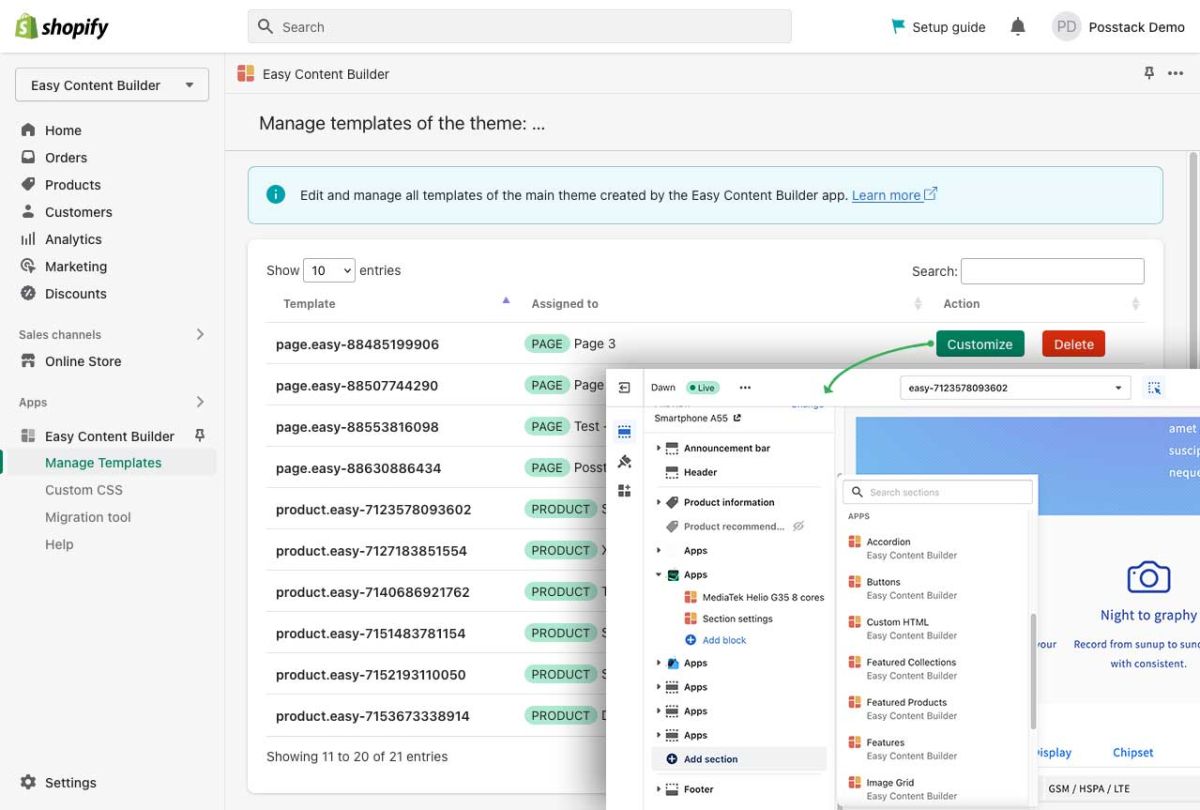
* Then select the template that you want to edit and click '''Customize'''. | * Then select the template that you want to edit and click '''Customize'''. | ||
[[File:Manage templates edit.jpg|1200x1200px]] | [[File:Manage templates edit.jpg|1200x1200px]] | ||
Latest revision as of 03:14, 23 November 2022
After you create a Product/Page/Blog Post template by following the steps in the section Create Templates, you will be automatically redirected to the Theme Editor where you can start editing the page.
Another way to access the Theme Editor:
- From your Shopify admin, click Apps > Easy Content Builder
- From the Easy Content Builder dashboard, click Manage Templates.
- Then select the template that you want to edit and click Customize.

