Manage Templates: Difference between revisions
From Posstack.com Documentations
No edit summary |
No edit summary |
||
| Line 4: | Line 4: | ||
* From your Shopify admin, click Apps > Easy Content Builder | * From your Shopify admin, click Apps > Easy Content Builder | ||
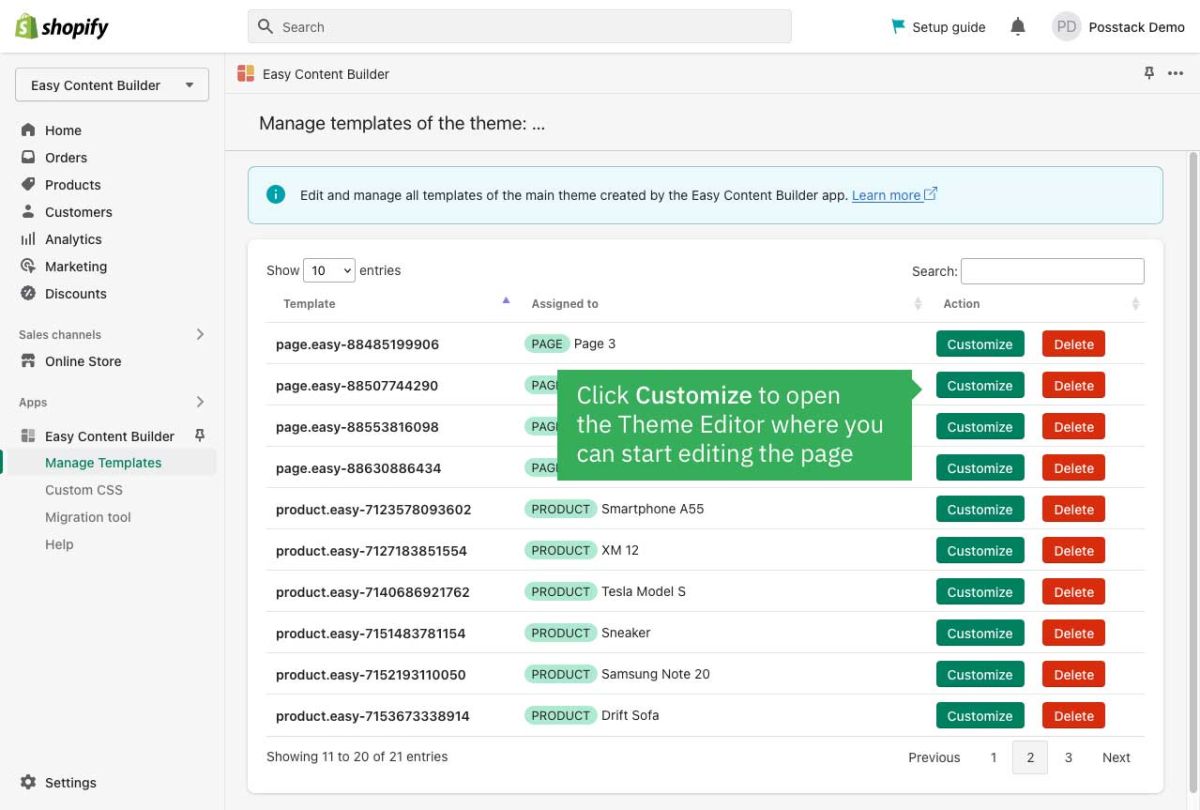
* From the Easy Content Builder dashboard, click '''Manage Templates'''. Here you can delete a template or find the template that you want to edit, and then click '''Customize'''. [[File:Manage templates.jpg|1200x1200px]] | * From the Easy Content Builder dashboard, click '''Manage Templates'''. Here you can delete a template or find the template that you want to edit, and then click '''Customize'''. | ||
Note: After you create a Product/Page/Blog Post template by following the steps in the section [[Create Product Templates|Create Templates]], you will be automatically redirected to the Theme Editor | |||
[[File:Manage templates.jpg|1200x1200px]] | |||
Note: After you create a Product/Page/Blog Post template by following the steps in the section [[Create Product Templates|Create Templates]], you will be automatically redirected to the Theme Editor. Here you can start editing the page. | |||
Revision as of 03:04, 23 November 2022
All templates you create using the Easy Content Builder will appear under the section Manage Templates of the Easy Content Builder dashboard.
Steps to manage those templates:
- From your Shopify admin, click Apps > Easy Content Builder
- From the Easy Content Builder dashboard, click Manage Templates. Here you can delete a template or find the template that you want to edit, and then click Customize.
Note: After you create a Product/Page/Blog Post template by following the steps in the section Create Templates, you will be automatically redirected to the Theme Editor. Here you can start editing the page.

